Monday, September 30, 2013

Sweet boxes and envelopes!

Well my not so tidy desk got invaded and all my skinny bits of paper were stolen with a trill-lil-lil and a flipperty flap of "you are not having this back it is all MINE" from Spinny our Black Faced Wood Swallow.

I have been busy making some little sweet shoppe's for my Grandparents since they both love getting post.  One I played with the Tim Holtz Brick embossing folder.  The Sweet Shoppe was a design from the Silhouette Online Store, cut out and modified a little with the Silhouette Cameo.  
In the foreground of the photo you can see the individualised envelopes for Nanna and Granddad since they are all going into a mail box we were able to add a little bit of fun and interest.
So Lollies (including sugar free for Granddad), letters, cards and photos all ready to go!


 Happy Crafting *hugs* Sarah x

Sunday, September 22, 2013

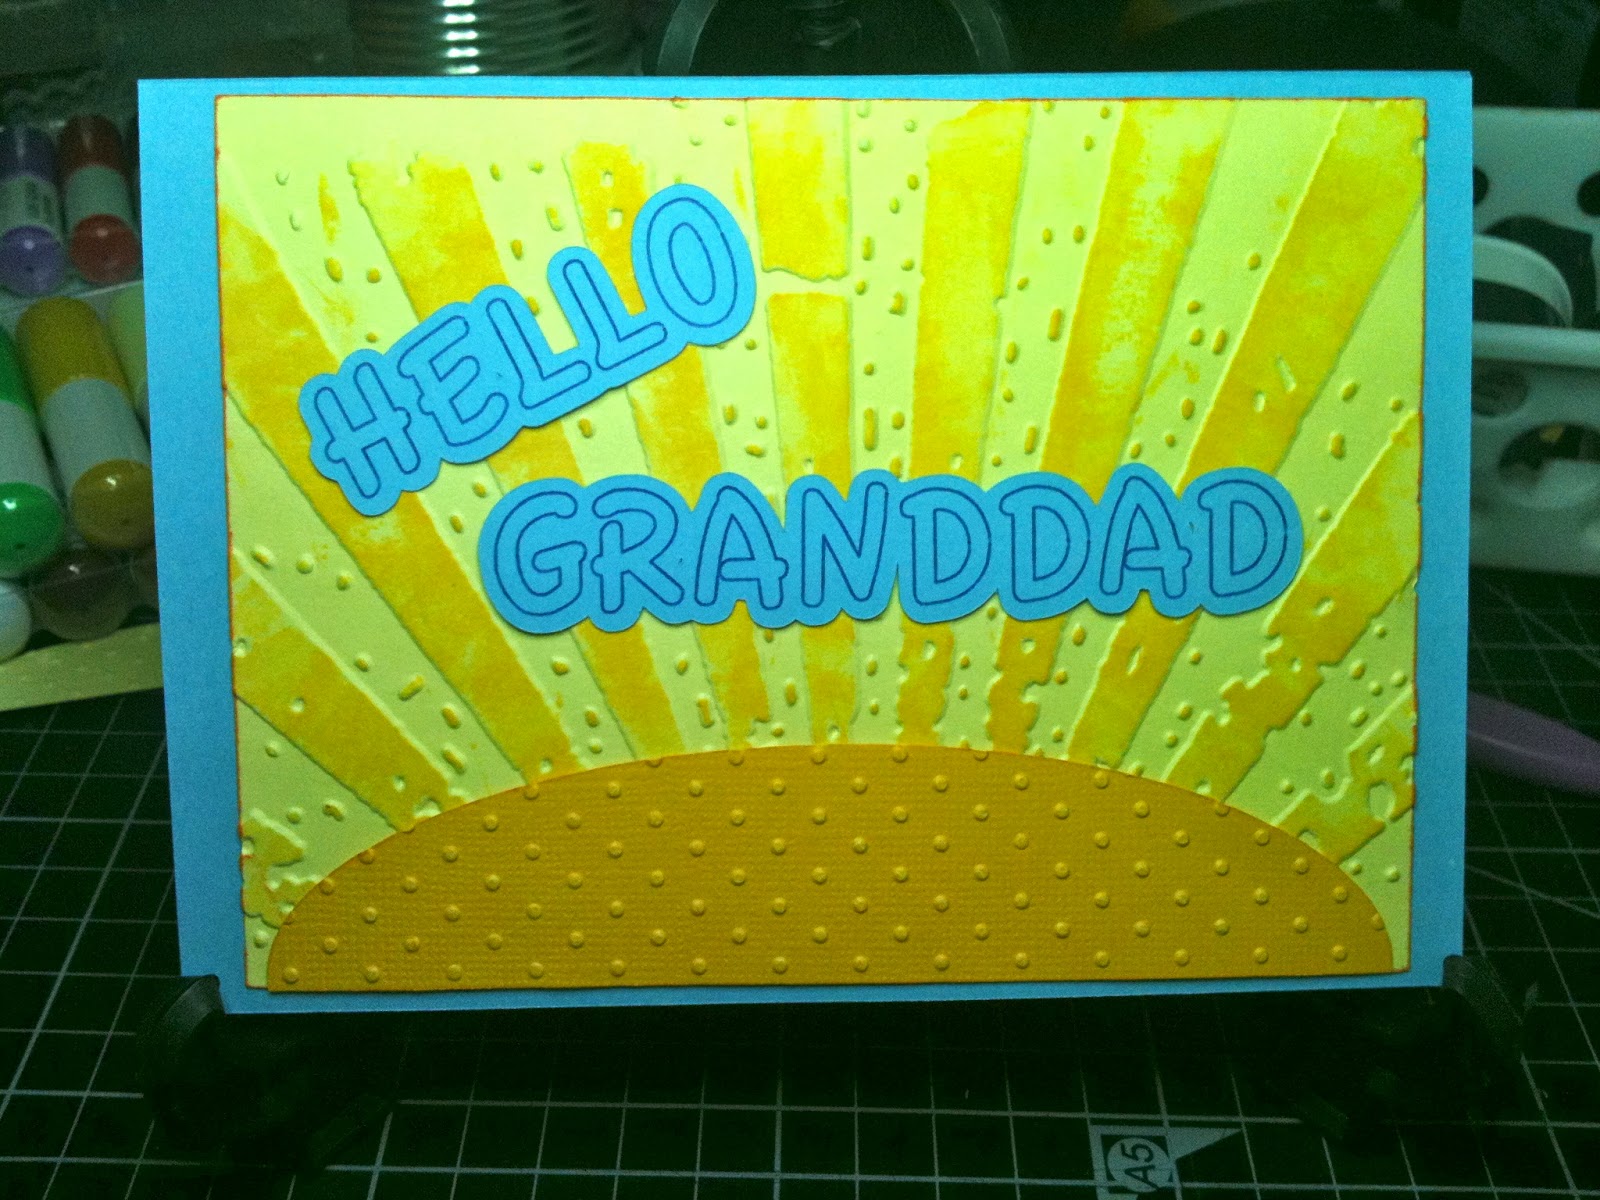
Hello Granddad!

Another quick card that took way too long to make (silly mistakes causing start overs lol)...

My Granddad is having a stay in the hospital so aside from calling every day we are sending love and happiness by post :-)

Hello Granddad was done with my Silhouette as were all the cuts (because I cannot cut a straight line to save my life lol) the background folder is a Tim Holtz.. Alterations, Texture Fades Rays (A2)... embossed through the Cuttlebug... then inked in Memento Dye Ink Dandelion.  The sun is embossed in Swiss Dots by Cuttlebug.
The inside is written by my Silhouette... found the right settings now ;-) hehe.  De-bossed then embossed to give more texture through the Cuttlebug using a home made defuser plate made from a self healing mat.  The Embossing folder was Christmas Stars but seems to lend itself to bright and cheery :-)

If you need information on how I made my Defuser - to leave an oval un-embossed in the centre... click here ;-)

Happy Crafting *hugs* Sarah

Twit T-Woooo

It's a family thing... Owls say Twit T-Wooo... ;-)

My Family has been having a hard time of it at the moment... so I am sending some LoVe in the mail... first card is for Nanna...


The Front is debossed with my trusty Cuttlebug with the folder Owl Flourish.  The inside is embossed with the mpress folder called Tulips Windows.  The writing is done with my Silhouette Cameo... so glad I have it because there are no stamps that say Twit T-Wooo hehehe

Ok Onward to Granddads card so he has something nice to open too :-)

*hugs*
Sarah 

Tuesday, June 25, 2013

Not a card!


 Today is Tom's Birthday!

Angry Birds was the idea and since cake making is NOT my thing! (Obviously) So Dairy Free, Egg Free chocolate cake with cherry drizzle covered in marzipan and green royal icing (natural food colours made from Chlorophyl) ... Dairy Free, Egg Free chocolate biscuits similar to TimTams.... and the boys angry birds toys stuck with royal icing.

The top two photos are after I stuck the edging on with Soy Cream... below are the half way through :-) before the edging :-)


Saturday, June 22, 2013

Happy Birthday Alan!

It's a CAMERA :-p  Alan loves his photography so I decided to send him a new camera ;-)


The design is from the Silhouette Shop... as is the Happy Birthday circle.  The embossing came from my lil Cuttlebug... I will have to check the name of it ;-)
Sorry for the limited updates at the moment I am busy in the garden as we have cool weather!
*hugs* Sarah

Monday, May 6, 2013

Mad May continued...


With everything hitting at once again I had to come up with a simple card for my Mum and Mother In Law... So I got to play with my cameo again and learn how to use the offset and mirror tools as well as welding and tracing so my simple card taught me an awful lot!  MUM is embossed with my ever trusty Cuttlebug with "Quikcutz - flowers"... I hope they like them!

Now I know almost all Mum's love flowers and my Mum in particular LOVES Orchids... so I did spend some time making a Silhouette file for the orchids... I inked them with Memento's and used my brush markers to do the details.  The frame is Lori Whitlock and the verses were sourced from the 'net.
Anyways... thanks for stopping by... *hugs* Sarah


Mad May!

G'day!  Well it is usually only March Madness that is a little frenzied... but May has become just as busy... May 12th is My Nieces 21st Birthday, Mother's Day and I will have been married to my dear Husband for 12 years too... I do NOT know how he has put up with me for that long!

So I have been busy between all the school holiday activities and finally with School going back today I got time to finish most things!

21st Birthday...

I made this "book" card using a cut file made by Amanda Davis... Absolutely gorgeous design and then topped it off with a flourish I found on Silhouette store and the most important words :-)

A few ribbon flowers for decoration and a butterfly as I remember being in my vege garden with a 6 year old Shauni watching butterflies and pulling weeds... Okay now I feel very old!


The all important box made using my Ultimate Crafters Companion and Cuttlebug... the "tag" is embossed with "Antique Keys" by Darice.
\


Ok I will write another card for the Mother's Day cards and gifts so the load time is quick so click on the next one :-)

Happy Crafting

Sarah

Monday, April 22, 2013

How to emboss a strip using a Cuttlebug

It has been busy here but I finally finished the next set of cards... more wedding cards!  While I was in the craft room I have been taking lots of photos as quite a few people have asked questions about how to make the "gap" in the embossing... so pictures I think are a little less confusing... I hope this helps :-)

 The six wedding cards I finally finished today with the help of my Cuttlebug and Silhouette Cameo... for details please visit my previous post "Wedding Card".
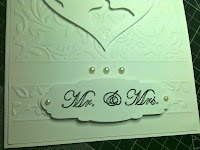
This post will hopefully clear up the method of the "gap"... so here we go...

 Start with the front panel that you would like embossed.  Be sure your card is good quality as if it is too thin you will break through while embossing.  I know I am stating the obvious but the whole idea of this blog is to pass on knowledge I have learned from some very crafty people on and off line ;-)


Pop your card in the embossing folder lining it up with the top/side of your folder as you want it to be embossed.  The sandwich here is A plate, B plate, embossing folder and card, B plate.  NOTE the position of the B plate, I sit it behind the edge of the embossing folder or you get a line where the edge of your embossing folder is on your cardstock.

This gives you the larger section embossed... then to get the strip of embossing I use a strip of self healing mat.  I use double sided tape to stick it to the folder so that it does not move while embossing.  You can use a strip or any other shape but it will not show detailed shapes well so keep it simple :-)  You can even make diagonal lines if that is what you need!
If you like you can do a whole folder with strips and gaps all the way down...

Cuttlebug Sandwich is A plate, B plate embossing folder with cardstock lined up as needed, self healing mat.
NOTE there is NO second B plate!  As always you do this at your own risk, it works in my machine, I have heard it works in other peoples machines but if you do this YOU choose to do this. ;-)

This gives an embossed strip which you might be happy with but I like to finish it with embossed lines.
Turn the cardstock over so that you are on the debossed side.  Line up the edges of the embossing with a line on an embossing board and use the embossing tool to make the lines needed.

Turn the cardstock back over and see if there is any embossing "over the line", if there is just use your embossing tool to gently push it back into place...
There you have it!

I hope this clears up how to get the embossed strips... happy crafting...
Sarah *hugs*


Saturday, April 13, 2013

Whimsical 2...

Today we are celebrating a neighbours second birthday... so we made a card but I apologise for the terrible photo... I will try and get a better one later if the card survives Miss 2!

Background paper: "Birthday Brights collection" from the Australian Simply Cards Magazine.
Stamp: "Wee love you bunches."  by Whimsy stamps.  Coloured with my Faber Castell Pencils.
Stampin' Up Flower punch for the sunflowers with a 1.7cm circle of Chocolate box Core-dinations for the centre.
Embossing:  Flower centres were embossed using the Cuttlebug Swiss Dots and Sizzix Tim Holtz Alterations Pocketwatches folders.
Silhouette Cameo cuts:  The mat is "Scalloped Label" and the Banner is "Banner 2".
Font: Zapfino with pink glitter sketch pen.
Ink: Memento Rhubarb Stalk Dye ink.  The banner, Mat and Sunflowers are all softened with a daubing of the ink.  The yellow/orange print paper needed a little un-brightening lol.

Hope you liked it... Happy Crafting...
Sarah x

Thursday, April 11, 2013

Wedding Card

Well my Nephew is getting married and I am gaining a Niece.... very exciting :-)  So to celebrate a wonderful young lady joining our family I made a card... I know... fancy that!


The background is a Cuttlebug Folder "Victoria" which was rolled through with the top B plate just on the edge of the folder so there isn't a folder mark left on the cardstock then I used the same folder with just a strip of self healing mat instead of the top B plate to get the stripe then simply used the Crafters Companion Ultimate Pro and embossing tool to make the lines.
The heart is Design ID #1292 from the Silhouette store called "Wedding Cameo" which I think is quite beautiful.  The frame is also cut on the Silhouette Cameo and Congratulations is sketched in the font Edwardian Script.

Hope you like it... Sarah x

Saturday, March 30, 2013

Happy Easter!

Well today I am celebrating my Birthday and my dearest Husband and Sons got me a Silhouette Cameo (Ok so it arrived early and I already had a little play but today is official!) and my Mum, Alan and a dear friend Sam sent me gift vouchers that enabled me to get the sketch pens and another mat for the Cameo (which is probably a good job since my whoops earlier on nearly cut clear through it!).  So really big Thank You's to everyone :-)

Anyways I decided since I am banned from housework today that I would make the boys some Easter Cards with the Silhouette Freebies which was "Happy Easter", a Bunny and a Chick.  So I cut the sentiments and images on the silhouette then embossed a panel on my Cuttlebug (yes I still love my CB!) with the Spots and Dots embossing folder.  Then used the sketch pen in the Silhouette to do a nice inside (since the boys complain they can't read my writing hehe)... and bobs your uncle... have a wonderful Easter everyone...


The Fronts
And the insides

Happy Easter Everyone!

Saturday, March 23, 2013

Triple Layer Card #2

G'day,

Well I liked the first triple layer card so much I made another one... this time though the colours were Grape Jelly, LuLu Lavender, Sweet plum, Lilac Posies and Angel Pink Mementos Dye ink.  I was a little apprehensive on such an array of shades but I think it worked :-)

I used my Cameo Silhouette files I used for the last one to do the cutting out... still way more straight and accurate than I will ever get free hand!  I would like to know how everyone else attaches bows to their cards?  In this case I used wet glue as the silicon dots don't seem to cut it and neither does the double sided tape.

For this card it only takes 2 A4 sheets of card, one black one white.  
The black sheet has the card base A6 size (21cm by 14.5cm) then rectangles of (8cm by 12cm) and (9.5cm by 5.5cm) cut out.
The white A4 sheet has two rectangles of (14cm by 10cm), a (11.5cm by 7.5cm) rectangle and a (9cm by 5cm) rectangle cut out.  One of the 14cm by 10cm rectangles gets decorated and put inside the card to be written on.

Mount the other 3 with a very, very little amount of double sided on 2 corners each just so that they do not move when you are stamping.

When you stamp you will get a bit of a gap in your stamping where your card moves to the next level but this gets covered by the black card.  I do stamp with a piece of foam underneath to give me some give and I get a much better image.


 Continue stamping with your images - in my case Stampin' Up! "Priceless" - until you are satisfied.  I have placed the just stamped one next to the previously made and mounted card to show the difference the contrasting card bases make.

Then the tricky part is mounting it all evenly... I use double sided tape to put my cards together and make sure I don't push to stick down until I am certain it is even.  Don't forget to put your ribbon in before you stick down whichever layer you want it in!


Happy Crafting!
Sarah x